Search This Blog

Showing posts with label chili. Show all posts

Friday, 8 March 2013

Walnut Roasted Squash

Tom today!

My housemate James is a proper bargain hunter, and recently he found us an offer to get four veg boxes (from the riverford company) for 20 pounds. As a result we've had a nice variety of vegetables we've been trying out new recipes with. This is a variation on a recipe I make quite a lot with roasts. Here I've really extended the Asian flavours, and the walnuts and pumpkin mix well.

Ingredients (serves 4 as a main or around 6 as a side dish):

1 Japanese Pumpkin
3 cloves Garlic
1 Red Chili
1 tbsp Sesame Seeds
4 tbsp Soy Sauce
2 tbsp Sake
3 tbsp Olive oil
120g Walnuts
Salt and Pepper (around a tsp of each)
1 tsp Nutmeg
1 tbsp Sea flakes
1/2 Red onion

Method:

Preheat the oven to 200 degrees Celsius
Peel the pumpkin, then halve it and scoop out the seeds (I find it much easier to do in that order)
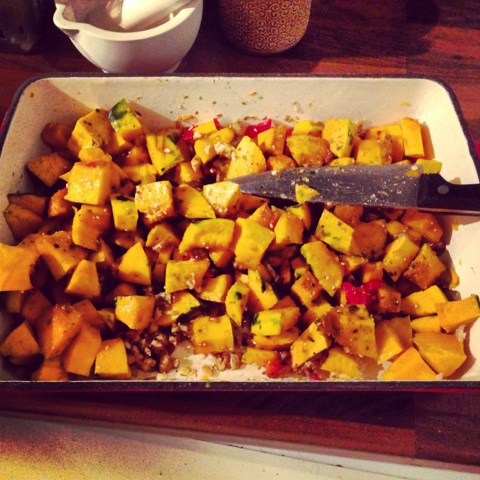
Chop into 1 cm chunks
Dice the garlic and chili finely
Crush the walnuts and slice the onion roughly
Throw everything in a roasting tin
Add the oil, sake, seeds, soy sauce and spices
Season to taste
Toss everything to mix and coat it all
Bake until the pumpkin is soft - around 35 mins
(If you find that quite a lot of liquid is coming out, you might like to turn the oven up for the last 15 minutes to boil off the liquid and crisp up the pumpkin slightly)

This is quite a simple recipe, and goes really tasty with the sweetness of the raisins in the baked cabbage recipe (link). Hope you enjoy it!


Avocado Salsa

Tom here,

This is another simple recipe, but one I make all the time. There are very, very few meals that aren't improved by a bit of fresh salsa. Curry - salsa, beancakes - salsa, roast dinner - salsa, you get the idea.

Ingredients: serves two

1/3 Cucumber
1 Tomato
1/2 Avocado
1 Red Chili
1/2 Red Onion
1 tsp Balsamic Vinegar
Optional:
1/2 Chestnut Mushroom
1/3 Carrot

Method:

Chop everything roughly into a mixing bowl
Add the balsamic vinegar and toss to mix
Enjoy!

I wanted to keep this recipe light and healthy, but if you prefer you can add a dash of olive oil for richness.


Monday, 25 February 2013

Spicy Noodle Salad

This recipe is originally a Jamie Oliver recipe that I adapted and changed a bit. I have made it several times and tweaked it a bit each time, and this time I decided to use the opportunity to try and do something interesting with the stalk of broccoli - something I always feel wasteful throwing away but never really know what to do with! Using this method of slicing it really thinly and marinating with courgette and carrot worked really well

Ingredients:

1 stalk of Broccoli
1/3 Courgette
1 Carrot
1/2 cup White Cabbage (shredded)
2 tbsp Rice Vinegar (any nicely flavoured vinegar will work really)
1 tbsp Sake (optional - I didn't include this but it would have gone nicely)
1/2 tsp Sugar
1/6 tsp Salt (just a big pinch really)
3 Cakes Wholewheat Noodles
1 Chili
1/2 Red Onion
1 tsp Coriander
1 Lime
1 tbsp Sesame Oil
1 tbsp Soy Sauce
1 tbsp Brown Sugar
2 tbsp Sesame Seeds
1 tbsp Pumpkin Seeds
Salt and Pepper

Method:

First to marinate the vegetables, mix together the salt, sugar, vinegar and sake
Slice the vegetables thinly, about 3-4 mm thick (if you have a mandolin use it but I managed fine with a knife)
Pour the mixture over the vegetables and toss to coat, set aside
Boil a kettle and pour over the noodles, leave to soften and then strain with a colander
Cover with cold water to stop them from cooking, and also to stop them socking together
Heat a small pan, add the seeds and then the sugar
Once the sugar melts, take off the heat stir constantly to coat the seeds well - if they start to stick in clumps break them up now as it's easy while they're still hot but once they're cool it's much more difficult
Leave to cool (you might want to transfer them onto a sheet of baking paper and put the pan straight in to soak, burnt/melted on sugar is an absolute pain to clean off)
Chop the onion and chili and mix in a mug with the soy sauce, sesame oil and coriander
Juice the lime into this and add about half of the zest (feel free to add more if you like but I find this make the lime too overpowering - I'd usually go for about 1/3 to be honest)
Strain the noodles, then combine with the onion and chili mixture
Toss to coat well
Stir in the vegetables
Season to taste
Serve!

The vegetables used in this are pretty flexible, I thought it was a good and easy say to use up the broccoli stalk but you can make it with anything. Some mangetout or sugarsnap peas make a nice addition. The sesame oil and sweetness of the seeds go really well together. I like this about as hot as I can stand it but that's just personal preference. Let us know any suggestions you come up with at twocooksoneblog@gmail.com

Wednesday, 19 December 2012

Pad Thai

Hey guys, both me and Jess here today,

This is a dish I've made a few times, it's one that I've adapted slightly to suit my tastes but is based on a recipe you can find all over the internet and in all thai restaurants. However, when I've looked on the internet, almost every recipe seems to differ and there is little in common. This is a recipe that can be easily adapted to have meat, or to be vegan, and to be gluten free or gluten...full (?) noodles. This time I'm making it vegan, gluten free and without tofu as Jess isn't too keen on tofu yet, and I've only just got her into thai food so yeah, baby steps. Anyway, I'll mention times where you can include different things if you want too. I'm using spring onions here instead of regular white onions so I add them later, but if you're using a white onion then add it earlier on. Also all of the vegetables are changeable, these are the ones we wanted/what asda had to offer, you can pick your own! Traditionally (as far as I can gather) Pad Thai uses both chicken and tofu, and coats the noodles in egg to give a thicker consistency, feel free to add an egg if you prefer, you can substitute this for 1/4 cup of silken tofu, but I don't think this gives quite the same effect so I prefer just to leave it out.

Serves 4

Ingredients:

For the Pad Thai Sauce:

1 tbsp Tamarind Paste (this sounds like something no one has ever heard of but the Sainsbury's in fallowfield sells it so I'd imagine most do)
1 tbsp Peanut butter (if it's not crunchy, it's not worth it.)
3 tbsp gluten free Soy Sauce (or normal, I use dark because I prefer the colour and flavour it gives but as ever, you're the boss!)
3 tbsp Brown Sugar
1 tsp Crushed Chilis
1 tsp Ground Pepper (ish)
1/3 a cup of Stock (I used boiling water with 1/4 of a Kallo cube in it)

For the veg:

1/2 Courgette (sliced)
1 Pepper (chopped into sticks)
1/2 cup Mushrooms (sliced)
1 Carrot (thinly sliced)
3 Spring Onions (sliced into rings)
Handful of Mangetout
Handful of Sugarsnaps
1 hot Chili
1 large handful of crushed Peanuts
1/2 a pack/1 1/2 cup Beansprouts
Large Handful of Spinach

For the noodles:

4 cakes/a 4 person portion of whatever noodles you want (we're using a pack of tesco's fresh rice noodles as they are both nice and vegan/gluten free but anything will work, I would usually flat wheat noodles as I like the texture)
1 pan of Boiling water

Salt and Pepper to season
1 Lime
A dash of oil to fry in

Optional: 1/2 a chicken breast per person, marinated in soy sauce, stock and garlic beforehand, or 1/2 a block of diced firm tofu (don't use silken here) marinated in the same way. You can use other meats if you'd like but you'll probably have to adjust the cooking time for this, try to shred whatever you're using so it cooks quickly. Pork and beef would both work well I imagine.

Method:

First cook the noodles (if you need too) place in the boiling water and leave for 5 minutes to soak until soft, or if you're using large noodles and you think they need simmering briefly then simmer then, then strain and leave in cold water so that they don't stick together.
Mix the sauce together, the boiling water should help with this.
Heat the oil in a frying pan (you'll need a large one, we ended up splitting into two pans) over a high heat
Now add the onion if you're using one, and chicken and/or tofu, fry until just browning and the onions are sweating.
Add the chili - if you're following this recipe exactly and this is the first thing you're adding just fry the chili on its own for a minute or so before adding the rest of the vegetables.
Add the vegetables - all except the beansprouts and spinach (these will go in right at the end), if you like you can stagger them to get an even cooking, I'd add the courgette, carrot and pepper first and brown and then the rest, but honestly I generally like the crunchy vegetables crunchy and the softer ones softer so I chuck it all in and cook for the same amount of time.
Add in about 1/3 of the sauce mixture and toss through, as the vegetables start to cook you might need to reduce the heat slightly to prevent burning
Toss in the peanuts as well
Fry everything until it's starting to look cooked
Now add your noodles and all but a couple of spoonfuls of the sauce - use a spatula to break the noodles up a bit so the veg and noodles mix well (otherwise you get all noodles on top and all the veg at the bottom) - now is when you would add a whisked egg
when the noodles are heated through and everything is well combined, add the spring onions (if you're using them) beansprouts, spinach and the remainder of the sauce (just to coat the last few things)
Make sure the sauce is properly reduced (i.e. not just a runny mess at the bottom and has given everything a nice coating)
Serve and enjoy!

This recipe can be easily adapted to any different combination of meat, vegetables and noodles. I like to add red cabbage to my stirfrys at the last minute so there's something with a nice crunch as you eat it, but again this is just personal preference. Let us know any changes you make at twocooksoneblog@gmail.com

NB// these go exceptionally well with the Cherry Bakewell Monkey Bars we made for afters! http://twocooksoneblog.blogspot.co.uk/2012/12/update-cherry-bakewell-monkey-bars.html

Christmas themed recipe soon to come!


Sunday, 2 December 2012

Butternut Squash Thai Red Curry

Tom tonight,

Jess is off being drunk somewhere (I have the texts to prove it) and my housemate Lucy is leaving tomorrow to get herself her own place so were making a big curry for her last meal. This is the first time I've made a red curry, and because I am cheap I have bought a curry paste rather than making my own. It's probably not too hard to make your own but this is easy and I think it still tastes awesome. I'm making this with Thai sticky rice and pan-fried red cabbage. The vegetables used in this can be changed for others if you like but I like the colour combinations these bring - originally I was going to add the red cabbage but I saw online someone suggested doing this and honestly it turned out incredibly tasty so will definitely make this a regular part of my cooking. I also baked chicken breasts in the curry paste for Lucy as a non-vegan. Also added peanut butter for an extra flavour as I'm liking adding peanut butter to asian dishes and butternut squash and peanut butter are a match made in heaven.

This recipe makes enough for about 5 portions of curry and rice.

Ingredients:

For the Curry:

1 Butternut Squash
1 large Onion
1 tbsp Olive Oil
3 tbsp Thai Red Curry Paste
4 cloves Garlic
1 small Chili
2 inch of fresh Ginger
6 large closed cup Mushrooms
1/2 a Courgette
1 Red Pepper
1/2 pack of Dwarf Beans
1 dessertspoon Peanut Butter
1/2 can Tomatoes
1 litre Boiling Water
1 1/2 tsp Bouillon
1 inch block of Creamed Coconut
3 tbsp Light Soy Sauce
Salt and Pepper to taste

For the Chicken:

1 Chicken Breast
1 tbsp Red Thai Curry Paste

For the Rice:
1/2 a pack of Thai Fragrant Rice
A sprinkle of Seaweed Flakes (my secret ingredient for everything)
Cold Water

Method:

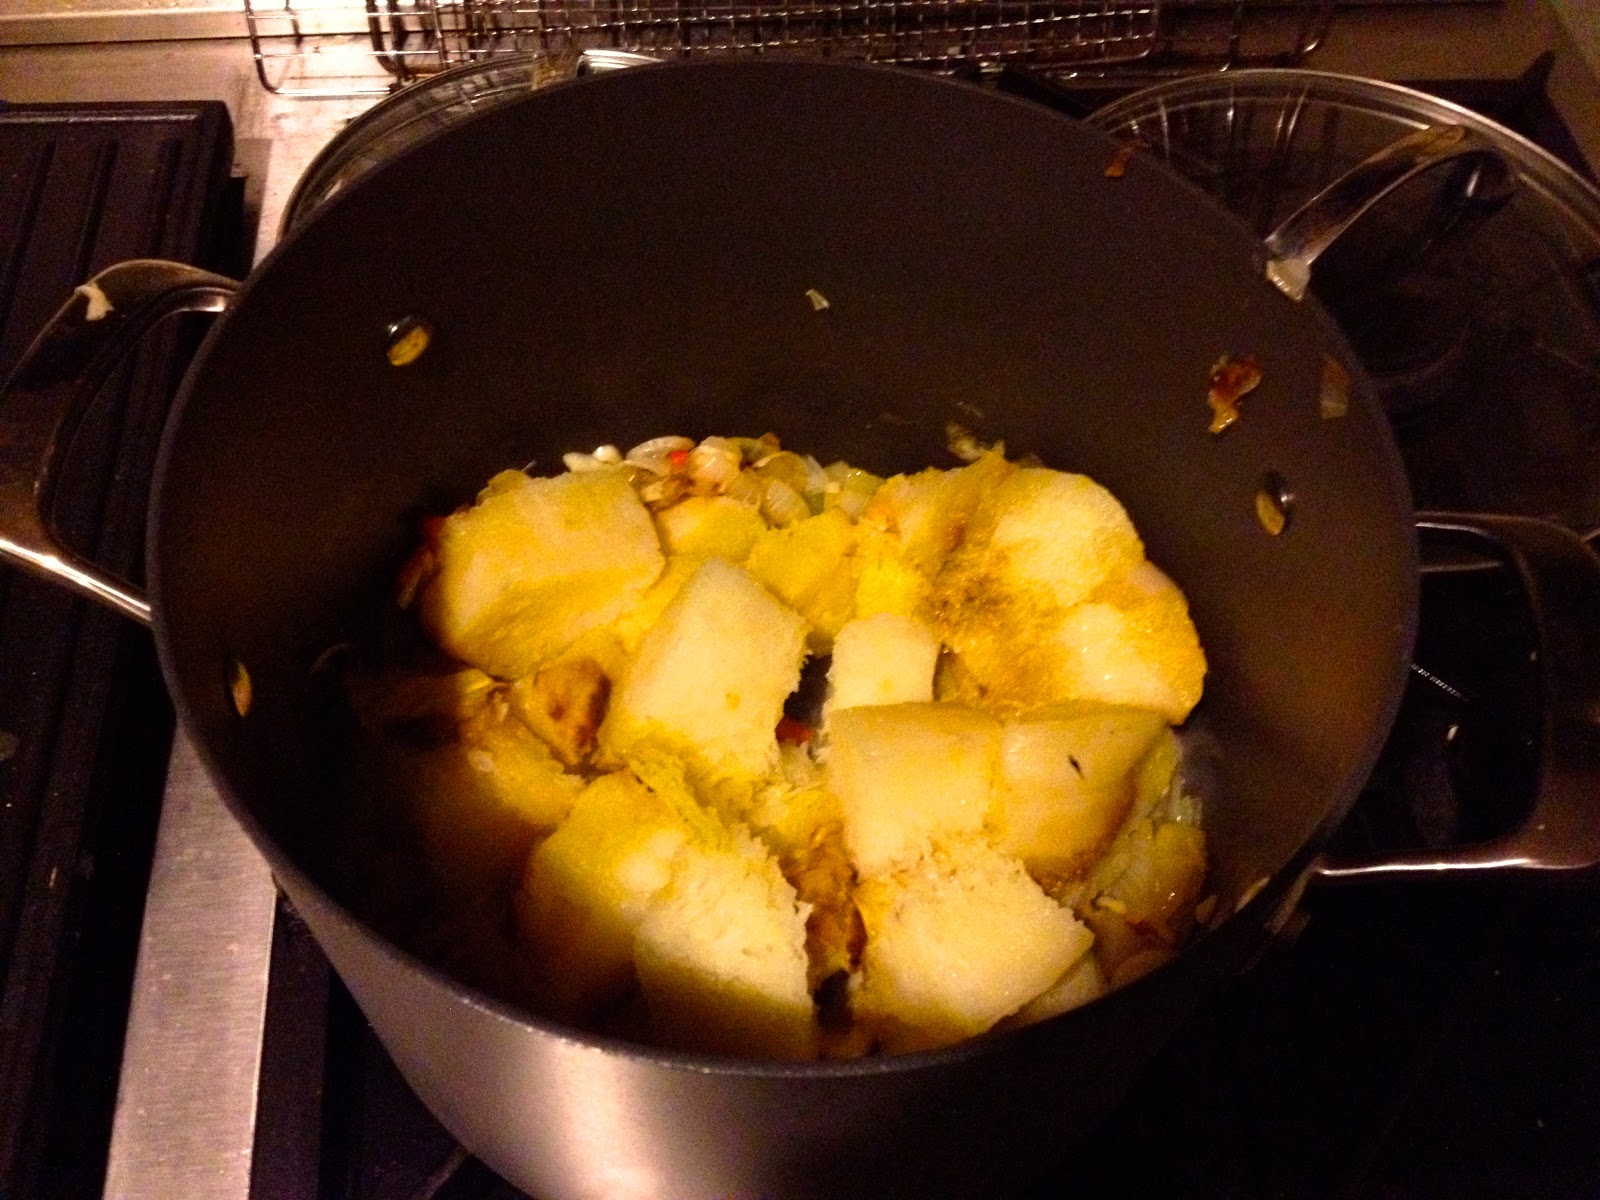
First peel the butternut squash, drizzle with a little bit of oil and pinch of salt flakes and roast in a hot oven until cooked and browned.
Next put the rice on, cover with a centimetre of water and add a sprinkle of nori flakes if you have them, a sprinkle of jasmine leaves  also adds a great flavour if you have them.
Put on a high heat until bubbles form around the edge of the saucepan, then turn down to a low heat and put the lid on.
Leave until all the water has been absorbed, then fluff up and leave with the lid on to steam for a few mintues. While this cooks start the curry
Chop up the onion and fry in oil in a saucepan until soft.
Once soft, add the garlic, chili, ginger and curry paste, fry for a few minutes.
Chop up the mushrooms, courgette, pepper and dwarf beans and add to the saucepan, mix thoroughly and cook until soft.
Add the peanut butter and mix well, it helps to put the peanut butter to the bottom so it heats up and then it's easier to stir in.
Add the tomatoes and mix again.
Add boiling water until the vegetables are covered by about a centimetre of water and just a bit thinner than you want it to be.
Next add the stock and creamed coconut (you can make each of these separately if you want to but i didn't think it was necessary and this seemed easier to get the right consistency.
By this time the butternut squash should be nicely roasted, add this to the curry. At this point I rubbed the chicken with the paste and put in the oven to bake (reuse oven tray, save washing up, done).
Mix all of this together and bring to the boil.
Simmer until the correct consistency (as you like it).
At this point I quickly fried the cabbage (link) if you want to make that as a side.
Serve and enjoy.

Really pleased with how this came out, the curry paste I used wasn't fantastic but I imagine you could get nicer ones without too much effort, and if i find a decent recipe to make one I will definitely post it later. This could be very easily adapted to make it how you like, spinach might make a nice addition to this! As always, let us know your own versions at twocooksoneblog@gmail.com.

Nutritional Info:


                      Calories   Carbs     Fat     Protein     Sodium     Sugar
          Total:     885         113       40         24          3481         42
Per Serving:       177          23        8           5            696          8


And 1 cup of rice adds around 240 calories, and 101 from the cabbage (worth it!) giving 512 for the meal in total! (not including chicken)

Ignore the cabbage, originally this post included that recipe.


I apologise for the steam, it was a very, very, very, very cold day.


The vegan version

And with the baked chicken.

Tuesday, 20 November 2012

Roasted Butternut Squash Soup


Tom again tonight,

Making soups out of squashes (and pumpkins!) is an absolute favourite of mine. When roasted the flesh almost melts down to give a really smooth and almost creamy flavour. I have…not to say perfected, but tried and tested two recipes for roasted butternut squash soup, and to be honest, I can’t decide which is better. So I’m going to list both here and you can decide which you prefer!

Simple Hearty Butternut Squash Soup

This soup is a really good warming winter lunch when going outside is just too cold to be worth it. For those who eat cheese, this soup is amazing with chunks of gruyere dropped in to melt, or for that matter any cheese (cheddar melts gloriously). Once made the soup will freeze well and keep for…well I’ve never kept it long enough to find out. However, once you defrost it fully give it a stir before you heat it up again as it will separate (and look pretty disgusting I should warn you) but once it starts to bubble it should go back to looking more like soup.

Ingredients:

1 large Butternut Squash
2 large Onions
3 large cloves of Garlic
2 tbsp Oil (or butter)
1 tsp Nutmeg
Pinch of Cloves (optional)
1 litre of Vegetable Stock
Salt and Pepper to taste

Heat oven to 200°C
Split the butternut squash in half
Scoop out the seeds using a spoon and discard
Place on a baking tray (flesh down) and bake for 25-30 minutes (or until flesh is soft throughout). Once it’s fully roasted, leave it on a side to cool, then carry on with the recipe (You can also stop at this point and freeze the butternut squash for a later date, the flesh is soft enough to scoop off the skin and can but put in a tub easily).
Chop the onion roughly and add the oil or butter (whether vegan or dairy). Butter gives richness and some colour to the onions but also adds fat so it’s your call.
Now put the lid on and leave it. Totally. You can stir it occasionally but that’s it. Leave it for about 20 minutes. The onions will really brown and caramelise which gives the soup a rich flavour with really goes with the roasted butternut squash.
Once the 20 minutes are up add the garlic and few for another couple of minutes, then scoop out the flesh of the butternut squash and add it to the pan.
Fry the flesh for just a couple of minutes while you season the soup with nutmeg and salt and pepper, and cloves if you want (just a really little bit).
Next add enough of the stock to cover the squash and bring the whole lot to the boil
Simmer for just a couple of minutes, then if it’s the right consistency, take it off the heat and blend.
Serve with bread and enjoy!

Nutritional Information (is made into 5 portions)

                         Calories      Carbs      Fat      Protein       Sodium        Sugar
          Total:         669           108        30           9              481             24
Per Serving:          134            22          6            2               96               5

Spicy Roasted Butternut Squash Soup

This recipe has a lot more flavours added. Also the combination of garlic, squash and chili gives off a really enticing smell. (This one has photos!) If you’re not such a fan of chili I would recommend the simple version of this roasted butternut squash soup. I like using both fresh and cooked chilli as they have quite different flavours and also different levels of heat so this recipe fries 2/3 of a chilli in with the soup and then adds the final third just before blending. I like to add butterbeans to this to vary the texture slightly, but if you don’t like them, don’t add them!

1 large Butternut Squash
2 large Onions
3 large cloves of Garlic
1 Red Chili
2 tbsp Oil (or butter)
1 tsp Cumin
1 tsp Corriander
1 tsp Paprika
1 litre of Vegetable Stock
1/2 can Butterbeans (optional)
Dash of Soy Sauce
Salt and Pepper to taste

This recipe starts off the same as the previous – halve the squash and roast it as above (200°C for 25-30 minutes), then leave too cool before removing the skin.
Then roughly chop the two onions and add to a large pan, caramelise with a lid on for a good 20 minutes.


Once the onions have browned nicely, chop up the garlic and the chili. Add all of the garlic and 2/3 of the chili.


Fry for a further two minutes, and then add the butternut squash flesh. Heat through and then add the spices, and fry briefly.


Next pour in all the stock until it covers the ingredients. Don’t add it all if you don’t need too, it will be too runny.


Ignore the butterbeans, I added them by accident then had to fish them out again one by one. Here's an artist's impression of what that might have looked like.

Wait a minute...what did you use as bait for butterbeans?
Sorry, got a bit sidetracked there. Really trying hard not to get any work done tonight. Now bring the soup to the boil, and simmer to the correct thickness (as you like!).
Add the final 1/3 of the chilli, and blend until smooth.
Now you can add the butterbeans (if you are).
Finally serve in a bowl with a nice piece of crusty bread.
Add a dash of soy sauce to the soup to give it a nice depth of flavour.


Hope you enjoy these recipes, and as ever let us know any suggestions or improvements you made at twocooksoneblog@gmail.com. Feel free to create your own variation from the basic recipe!

Friday, 16 November 2012

Thai Chickpea Burgers

Tom's turn today! (alliteration win)

This is one recipe that is almost completely my own creation. After going vegan I had the occasional craving for something nice and hefty and filling and well....burger-like. Anyway, mushrooms burgers without goats cheese just weren't the same so I decided to invent my own recipe. It's similar-ish to falafel (in that it involves chickpeas - but what vegan food doesn't?) and has the spicy fresh flavours that come with thai food. This recipe can be gluten free or not depending on what you use to bind it (see the notes in the recipe list).

The nutritional values are listed here (as best as I could work them out), this recipe makes 8 small burgers or 4 large-ish burgers (I'd usually use this to make 4 dinners worth):

                        Calories      Carbs       Fat      Protein       Sodium        Sugar
   Total                530            73          32         18               36               9
  Per Serving         66              9            3           2                5                1

Ingredients:

1 can Chickpeas
1/2 an Onion (I prefer red)
1/2 a Courgette
3 cloves of Garlic
1 cm piece of fresh Ginger (I have absolutely no idea how much this weighs - maybe 40g? You can use Ground Ginger if you want, probably around 1.5 tsp will be alright)
1 Lime
2 tbsp Tomato Paste
1 small Red Chili
1 tbsp Olive Oil (or if you have it sesame gives a great flavour)
1 tbsp Soy Sauce
Either 4 tbsp Flour/Gluten Free Flour OR 5 tbsp Oats
1 tsp Baking Powder
1 tbsp Cornflour
Salt and Pepper to taste

This works with a mixture of the two i.e. 2 tbsp Flour and 3 tbsp Oats. If you eat eggs and want to use one instead I would substitute the half the flour and the oil for one egg (you can omit all the flour if you want too but it helps to make the mixture the right consistency - as always, have an experiment). I know buying fresh ginger probably feels like a massive pain but trust me DO IT. It is undoubtedly worth it. At the risk of sounding pretentious (who I am I kidding? I'm vegan) ground ginger just doesn't even compare in flavour and you need so much more to taste it and it just isn't as nice. A decent sized piece of ginger is a staple of my weekly shop, I'd recommend it.

Recipe:

Preheat the oven to 220 degrees celcius.
Strain and wash the chickpeas (you don't necessarily need to do this, I just hate the smell of the water they come in).
Smush them in mixing bowl - you can use a potato masher if you want but honestly, I find it easier to just use my hands. Punch them, physically punch them. Great stress release.
Chop up the onion, chili and garlic and add it into the bowl.
Grate the courgette and the ginger into the bowl.
Juice and zest the lime.
Add the tomato paste, soy sauce and olive oil and mix thoroughly.
Either sift in the flour and baking powder and cornflour or stir in the oats.
Season to taste.
Mix around with you hands until they are a good consistency (this doesn't always happen, add either more lime juice/water or flour until you can make them start to stick together).
Squash into burger shapes and place on a baking tray.
Bake for 20-25 minutes on either side (or until golden brown/it looks cooked - entirely your call).
Serve and enjoy!

I like to serve two of these with boiled new potatoes, steamed veg and/or a salad - having both takes this to about 500 calories a portion (based on 150g potatoes, a normal size of vegetables). Also protip: a glug of sweet chili sauce can save even the driest and most burnt of burgers (something you learn quickly if you have as bad a memory as mine).

This is just how I like these burgers HOWEVER, not everyone likes thai food (I don't know why it's just true) so feel free to scrap all the flavours from these burgers and just use the basic recipe (chickpeas, courgette, onion, oil, baking power and flour/oats) and make them how you want to.

Suggestions:

Add a stick of lemongrass (or ground lemongrass) for an extra thai flavour - I didn't put this in the main recipe as it's something of a specialist ingredient but it regularly makes an appearance in mine.
Add a tsp of cumin, paprika, tomato paste and garlic - more of a mexican vibe

As always, let us know your improvements at twocooksoneblog@gmail.com or leave a comment!


Tuesday, 13 November 2012

Spicy Garlic and Lime Prawns


Just Jess here today! Tom is busy being a student.

Sadly (or not), this recipe isn't vegan. I love seafood and will apologise to nobody for this. It is however, gluten free, easy to make and really versatile. The ingredients I used made enough for two - I ate half fresh with gluten free spaghetti and kept half overnight in the fridge to eat the next day with salad. I imagine it would also work well with any other type of pasta, rice, potatoes, veggies, anything you fancy.If cooking for more people, just double the ingredients up.

Ingredients
1 lime, zest and juice
1 clove garlic, chopped
1 chilli pepper (I used a small red one), chopped
A drop of olive oil
100g king prawns
1/2 tin/carton passata (or chopped tomatoes, up to you)
1/2 pack (or about 10) closed cup mushrooms, chopped
1/2 courgette, sliced
Paprika and italian herbs to season

First, add half the lime juice to the prawns to marinate for a while. I just left it whilst I was chopping the veg but you could leave it longer.

Fry the chopped chilli and garlic in the pan and add around 1/4 of the lime zest. After a couple of minutes, add the mushrooms. When the mushrooms are softening, add the courgette. Fry until softened, then add the prawns and another 1/4 of zest. Fry the prawns with the veg for a couple of minutes, then add the passata/tomatoes, the remaining lime juice and zest. Cook for a few minutes until it starts to bubble a bit, then add the paprika and herbs. Cook for another 3-5 minutes. And serve.


Simple. I also added sweetcorn to the recipe, adding with the passata, but this is just a preference (and I had corn to use up...). If you like onion, fry one with the garlic and chilli. I'm weird and only cook onions with red meat. But again, just a preference. Oh yeah, and when I say italian herbs, I mean I literally used a couple of teaspoons of 'herbs italienne' that I bought in a French supermarket earlier in the year. Basil and oregano are probably what that means.